Fans of auto tuning go to a variety of steps to distinguish their own vehicle from the general stream, to make the car bright, noticeable and memorable.
At the same time, it is not at all necessary to completely redo the body, install massive aerodynamic elements or repaint the car in a poisonous color.
There is a much simpler, but at the same time extremely effective way to stand out and emphasize the attractiveness of the car. This is the underbody lighting.
You can implement such a system yourself. To do this, you will need the lighting element itself, as well as standard tools and auxiliary consumables.
Result
Let us remind you that in order to make the car interior more comfortable, you should approach the issue comprehensively.
Please note that the standard panel backlight has been improved
Keywords: half fret grant | interior lighting for Lada Granta | floor Lada Kalina | floor Lada Priora | interior lighting for Lada Kalina | interior lighting for Lada Priora | Lada Granta seats | Lada Kalina seats | Lada Priora seats | torpedo Lada Granta | torpedo Lada Kalina | Lada Priora torpedo
3
Found an error? Select it and press Ctrl+Enter..
Electric car EL LADA put up for sale
Installing floor (leg) lighting on Lada Granta, Kalina or Priora
How to reduce the backlight brightness of the standard MMC Lada Vesta
Installation of the Luxe central console from Lada Kalina on Lada Granta
Some points during use
Quite often, car enthusiasts have the question: “Is it prohibited to install car lighting?”, “What will happen if it is still prohibited?” and so on. In most regions of the Russian Federation, traffic police officers consider this type of tuning unacceptable. And, usually, they believe that underbody lighting falls under Article 12.4 of the Administrative Code, Part 1. According to this article, drivers must pay a fine for lighting in the amount of 3,000 rubles. or they may confiscate (remove) the backlight.
Therefore, it is worth considering in advance what kind of lighting to install and whether it is worth it at all, and, of course, how to handle it. Experienced riders recommend making an emergency shutdown button just in case, in order to avoid unpleasant situations with consequences.
Video of installing underbody lighting:
Source
Choosing the optimal underbody lighting
Car owners who have doubts about whether it is possible to install illumination on the bottom of the car can carry out this type of tuning procedure with their own hands without a twinge of conscience. From the assortment on the market, you can purchase flashing, multi-colored, periodically changing shade and point-flashing lighting.
The underbody lighting can be LED or neon. LED underbody lighting will require the car owner to purchase a special shock-resistant tube and an LED strip directly. On the market you can find a tape that, when cut to fit the parameters of the machine, functions without compromising the performance of the entire lighting fixture. This type of lighting is easy to install and reliable in operation.
Neon underbody lighting is a type of lighting that requires the purchase of gas-discharge lamps and special shockproof housings. Neon lighting allows you to focus light on one point.
Introduction
Illuminating the underbody of a car is an original way to make your vehicle stand out from the crowd. Few people decide to undertake such a radical modernization, because you will have to pay at least $100 to create original underbody lighting at any service center. In fact, almost any car owner can make the lighting themselves. In order for the car to take on a spectacular look, you will need a couple of hours of free time and budget materials that can be purchased at any auto parts store. Despite the fact that home-made lighting excludes remote control of LEDs or neon lamps using a remote control, improving the bottom will give the car a pleasant exterior.
Stylish underbody lighting makes the car stand out in traffic
Neon lighting on cars, its types, advantages and disadvantages
The modern type of tuning, called neon lighting, gets its name from the cold glow neon fluorescent lamps originally used for this purpose. It is an additionally installed system consisting of lighting elements with auxiliary devices that are responsible for its correct functioning. Today, the light source for such car design can be not only neon. There are the following types of lighting design for the exterior and interior of a car:
neon lamps, which are ordinary fluorescent lamps in which the working gas is inert neon;
Neon is usually used to illuminate the underside of a car.
- gas-filled flexible tubes filled with neon, the surface of which is coated with phosphor;
- LEDs in the form of individual plates or LED strips in silicone insulation.
Depending on the installation method, light tuning can be spot-based, in which the emphasis is placed on highlighting individual elements of the car, or continuous, performed along the entire contour. The following car elements can be subject to aesthetic upgrade:
- bottom, when lighting devices are placed under the car;
- interior, most often illuminated by the floor or dashboard;
- luggage compartment;
- individual elements of the car, for example, wheels or a radiator grille.
The advantages of colored lighting on neon lamps or tubes are:
- even diffused light;
- a brighter glow, which, with the right choice of color, can not only be aesthetically pleasing, but also improve the illumination of the road;
Neon components have their advantages and disadvantages
- no heating of lamps or tubes;
- long service life up to 15 years;
- lower cost compared to LED lighting.
The disadvantages of this type of lighting tuning include:
- susceptibility to mechanical stress when using fluorescent lamps;
- the need for additional installation of reflectors made of mirrors or foil to give direction to the light flux;
- inability to change color (this will require installing new tubes or lamps with a different phosphor composition).
Necessary materials
To make the bottom of a passenger car sparkle with new colors, and in the literal sense, lighting is installed there.
Since neon lamps have too many disadvantages and installation pitfalls, the best solution would be to use LED strips.
To assemble the system you will need a kit consisting of:
- LED strips;
- control unit;
- perforated L-shaped profile;
- aluminum corner;
- beacon for leveling the floor;
- ties measuring 2.5x100 mm;
- self-tapping screws for metal;
- silicone tube;
- copper stranded wiring with double insulation;
- heat shrink tube;
- basic set of tools.
Tools include a drill, soldering iron, a set of screwdrivers, wrenches, etc.
When choosing an LED strip, special attention should be paid to the degree of protection. It must be at least IP65.
Then you can proceed directly to the installation.
Will the result be satisfactory if you install neon lighting in the car interior yourself?
On eBay, Aliexpress and other sites, and even more so in car stores, as well as directly in car repair shops, you can purchase neon lighting for the car interior. A less common name used by tuning professionals for these glow lanyards is ambient lighting. It is used to add special charm by many top automakers, separating parts of door cards with subdued light, highlighting handles, glove compartments and legroom.
The play of light and shadow looks not just spectacular - it’s stunning, especially at the moment when you first see something like this in a car. But the question immediately arises: is it possible to do the same lighting on your no longer new and not so expensive, but so beloved car? What will it look like and will it be difficult to do?
Let's briefly look at the results in examples, answering the first question. So, does it make sense to install neon lighting in terms of visual quality?
By the way, systems for dispersing light light into the legs can now be found on almost any model, and since it is impossible to install it anywhere, you can always use your wits or turn to professionals - they will definitely help.
photo: flickr.com
We can definitely answer that the game is worth the candle. As an example, let’s look at the result of the work done by foreign customizers DMP Car Design, who installed ambient interior lighting on a new, but still cool Mercedes Benz E-Class in the W212 body. The way the backlight looks after installation clearly indicates that it is almost no different from similar equipment usually offered by car manufacturers from the factory!
A demonstration video of the result of the work is attached on Instagram:
Interior styling
Neon on cars is increasingly used to style the interior. We will talk about cold neon, which is a PVC cord, which is a colored shell, with a luminous inner layer (phosphor) and power conductors. The main advantage of cold neon over conventional neon tubes is elasticity. The glowing cord can take any shape, which made it possible to use it for tuning the interior of a car. Cold neon is quite durable, and you can install it yourself. There are several series of flexible neon:
- 1st generation;
- 2nd generation (marked CW);
- 3rd generation (CWH series).
The latest generation provides the brightest glow. Neon cords are available in different sections (from 0.9 to 5 mm). For installation in a car, it is sometimes convenient to use a special neon of the CWS series, which is made in the form of a cord with a cable. This way you can more securely attach the backlight between the plastic panels. The cross-section of the cord affects not only the elasticity and degree of illumination, but also the installation process. To select the required thickness, we recommend measuring the gaps between the panels before purchasing. This way you can buy a cord that fits most tightly into the seat. Flexible neon lighting that is unevenly fixed, as well as constantly hanging from vibrations, will not add aesthetics to your salon.
List of required equipment
Before thinking about how to illuminate the underbody of a car, the vehicle owner must take into account several important criteria. First, it is necessary to resolve issues regarding the comfort and quality of such manipulation; at the same time, you need to prepare the car and think about the result of the modernization.
In order for the underbody lighting to look aesthetically pleasing, it is necessary to evenly distribute the light source. Not all car models have the ability to attach lighting strips or lamps without the use of additional equipment. Most likely, the car owner will need to buy a device in the form of a cable attached to the bottom; such a simple device will help securely secure the entire lighting system.
To create illumination for the underbody of a car, you need to choose the right equipment; for low-slung cars, you should purchase a less powerful device; for high-slung cars, on the contrary, a brighter one that can highlight the beauty of the vehicle.
How to challenge a punishment
Most traffic cops do not fine citizens who use lights on the bottom of their cars.
Especially if they are installed in accordance with the rules described above. It is difficult to challenge a fine of 500 rubles (making changes to the design of a car without registration). The use of additional equipment in this case is an offense prescribed by law.
If the traffic cop wants to use a more severe punishment (deprivation of rights, increased fine), it is necessary to insist that the installed lighting fully complies with the GOST rules.
Wrongful fines can be challenged in court, but this only applies to cases where there has been an incorrect classification of the offense.
Grounds for punishment for illuminating the underbody of a car
Despite the fact that the illumination of the underbody of a car can be regarded by a traffic police officer as a special signal, such qualification is practically not used.
The most common are the following:
- making unlawful changes to the parameters of the car (Part 1, Article 12.5.);
- violation of legal requirements when installing lighting devices of improper color or operating mode (Part 3 of the same article).
Making unacceptable changes to the vehicle design
Everything discussed above is only possible options for developing the situation in practice, but not legislative justification.
If we carry out a detailed analysis of the regulations, then on this basis those who have installed underbody lighting on their car should not be fined.
We will provide justifications confirming this fact from the regulatory provisions of the Code of Administrative Offences.
For illegal changes to the design of the machine, punishment follows part 1 of Art. 12.5. The article states that the list of illegal changes is defined in the List of Malfunctions and Conditions (Appendix to the Traffic Regulations).
It is also said here that the specified punishment (warning or fine) is applied in cases where the violation does not fall under one of the other parts of this article (part 2 - part 7).
Now let's look at part 3. It says here that driving a vehicle with headlights emitting red light installed on the front, as well as driving a vehicle with light units in any part of the vehicle, the operating mode and color of the lights of which does not comply with the List, will result in more severe penalties. Punishment: imprisonment for up to 1 year.
In other words, all violations that are regulated by Part 3 of Art. 12.5., relate specifically to violations of the rules for the installation and/or use of lighting devices.
Part 3.1. The list states that the use of a vehicle is not allowed if the number, type, color, location and operating mode of the light units are different from those provided by the manufacturer.
The key word here is location. Since most cars are not designed to have underbody lighting, we conclude that this is a violation of the rules for the location of lighting devices.
It seems that it is precisely under Part 3 of Art. 12.5., following the above conclusions, citizens who installed light bulbs on the bottom should be fined. However, in practice things may look different.
Violation of established requirements when placing lighting fixtures on a vehicle
If we follow the literal understanding of the law, then the punishment under Part 3 of Art. 12.5. should follow regardless of whether the underbody illumination “extends” beyond its limits.
So, the backlight can be blue or red, but it is prohibited to use this color in front. The same thing applies if the lighting extends beyond the rear of the car - according to 3.6. According to the list, rear traffic lights should only be white, other light units (turn signals, side lights) should only be red, yellow or orange.
It is not entirely clear how a violation associated with lighting that extends beyond the boundaries of the rear will be classified. What will it be classified as - reverse lights, or other lighting devices (and what color is considered inappropriate?).
In our opinion, classify according to part 3.6. The list (and applying punishment under Part 3 of Article 12.5 specifically for color discrepancy) is not possible.
So, let's draw some conclusions. But it is difficult to predict what the situation will look like in practice:
- corpus delicti under Part 1 of Art. 12.5. no, since in this part a reference is made to Part 3, which regulates liability specifically for violations related to lighting devices;
- classification according to Part 3 of Art. is more appropriate. 12.5., and precisely for that legislative violation, which is defined in part 3.1. List, not part 3.6.;
- it is the violation of the location of the lighting units, since the lighting does not initially come from the factory, that is the main element of the offense.
What is cold neon
Neon cords for cars are copper wires coated with phosphor (a substance that begins to glow with diffused light under the influence of an alternating electric field). On top of the phosphor there is a winding of two additional copper wires of smaller cross-section. To reliably protect products of this type from environmental influences or damage, the cable is covered with a layer of PVC insulation and then colored PVC film.
The luminous cord is the most popular among car owners, since it can be used to quickly decorate both the interior of the car and the external parts (for example, the underbody). At the same time, the product does not require a powerful power source (it can even be powered from ordinary batteries). In addition, flexible neon can be given any shape, so the flight of fancy is not limited only to straight lines.
Another positive point is that, unlike conventional LED garlands, cold neon provides a glow along the entire length of the wire 360 degrees around its axis, and not pointwise. Thus, the light is bright and visible from afar.
However, before you buy a cord for finishing the interior (and especially the car body), you should pay attention to the letter of the law. The fact is that there is a GOST number 8769-75, which states that when installing additional lighting in a car, only white and yellow LEDs can be used. Any lighting can be installed on the bottom of the car, but it must be directed straight down. If the traffic police inspector considers that the selected red or blue LEDs look like “beacons”, then in this case you can lose your driving license for up to 1 year. Therefore, it is better to choose products for interior lighting.
List of required equipment
Before thinking about how to illuminate the underbody of a car, the vehicle owner must take into account several important criteria. First, it is necessary to resolve issues regarding the comfort and quality of such manipulation; at the same time, you need to prepare the car and think about the result of the modernization.
In order for the underbody lighting to look aesthetically pleasing, it is necessary to evenly distribute the light source. Not all car models have the ability to attach lighting strips or lamps without the use of additional equipment. Most likely, the car owner will need to buy a device in the form of a cable attached to the bottom; such a simple device will help securely secure the entire lighting system.
To create illumination for the underbody of a car, you need to choose the right equipment; for low-slung cars, you should purchase a less powerful device; for high-slung cars, on the contrary, a brighter one that can highlight the beauty of the vehicle.
Nuances during operation
During operation, misunderstandings may arise with law enforcement officers, since the traffic rules contain the nuances described above that can link the backlight with a violation. In order to prevent incidents, it is worth preparing by studying the rules. It would not be superfluous to install a backlight with adjustable brightness.
Before installing additional devices, it is better to consult with a person who has experience in this matter, or watch several training videos on the Internet:
Varieties
Among the types of lighting used today, neon and LED can be distinguished as the most common ones. If neon lighting is made, as a rule, using a gas-discharge lamp, which is placed in a special protective tube and attached to the bottom, then the LED variety is a flexible diode strip, also located in a protective tube. LED lighting is a relatively new type, more convenient and practical, and therefore more expensive.
If we compare the main technical characteristics of the two types of illuminators, it should be said that for normal operation of the neon type of device, a diffuser is required that is responsible for directing the light, while LEDs themselves direct the light and have higher brightness. Both lighting fixtures are housed in high-strength housings that can withstand a fairly severe collision. The underbody lighting kit usually includes two side lamps, two lamps for illumination at the front and rear, as well as all the necessary fasteners.
To control the lighting elements from inside the car, a special unit is used, equipped with programs that can be used to adjust the brightness, change colors, make the backlight flashing, etc.
The operating principle of the backlight can be one of the following:
- connecting lighting elements directly to the car's electrical circuit;
- backlight controlled on the dashboard or using a remote control;
- installation of flashing backlight (thanks to special functions in the controller);
- Autonomous lighting (without connecting to the car).
All this can be combined with each other, installing multi-color schemes that work, for example, as light music.
How to install and connect an LED strip in a car with your own hands
Installing and connecting the LED strip to the car will take some time, but this work can be done with your own hands without using additional force.
Installation option without interfering with the electrical network
The flexible LED strip can be connected without going through the power grid. For example, an RGB strip is installed. It is moisture resistant on four contacts.
To work, you need the following materials: a connector (4 pcs) or a soldering iron, a 12 V controller, a multi-core cable with the same colors as the controller, silicone acryplast.
Installation is carried out under the instrument panel in the cabin. Procedure:
- cut the strip to the required length according to special marks;
- solder contacts or fasten with connectors;
- if soldering was carried out, treat its places with silicone glue;
- The adhesive side of the strip is applied to the desired place;
- the wiring is hidden under the casing;
- the edges are connected to the controller;
- using charging from a telephone, one cable is soldered to the fuse, the second to the lug on the right side, after which the block housing is closed and inserted into the control device;
- The charger is inserted into the cigarette lighter.
This connection works when the engine is running or the ignition key is inserted.
Switching on via linear stabilizer
Changes in backlight brightness can be avoided by connecting a linear stabilizer. Namely, the integrated circuit plays an important role.
But for the system to work stably, you need to monitor the voltage. It should not fall below 14 W. Such a voltage reserve will ensure full operation of the LM7812, on the basis of which the stabilizer is based.
An alternative is the LM317 stabilizer. It is adjustable and has high conditions. It contains a resistor that adjusts the voltage with an output of 11V. This creates optimal conditions for the battery to operate at 12.3 V.
We recommend watching a video on the topic:
Connection via a switching stabilizer
The power connection through the pulse stabilizer is also carried out through fuses. This stabilizer is a mini-box with an LM2596 chip.
Connecting to such a stabilizer does not require configuration, only the work of soldering the wires to the input and output is carried out.
Switching stabilizers can withstand power strips of 20 W. If you purchase strips with a switching system, the stabilizer is connected in front of it.
If the control unit supplies 10 V, the operating period of the LEDs will increase. The voltage is adjusted with a screwdriver.
Battery connection method
The connection to the battery is made through a stabilizer or directly. The duration of operation depends on the power of the bulbs and the battery. With a direct connection, minus is connected to minus, plus to plus.
Ease of installation and low price make neon popular
The video shows how to install LED lighting on the underbody of a car yourself:
Neon is a pioneer, the first option that was and continues to be used in car lighting tuning. Ease of installation, relatively low price of the kit and other advantages have made neon lamps popular.
Today, literally in every stall you can buy this type of lighting. Neon modifications are much cheaper than LED modifications and are much easier to install. Even recently, neon components with special effects are being sold that simply captivate the eyes of others. As for the kit that goes for illuminating the underbody, it consists of a pair of neon lamps and fasteners.
Neon is fundamentally different from other types of lighting devices primarily in that it contains a gas-discharge lamp. The quality of this component is determined by the intensity of the glow. The operation of a neon lamp is based on the influence of an electric field that affects discharged neon. This discharged neon, located inside the tube, when exposed to an electrified field, turns into a mixture of ions, electrons and atoms. And neon lamps glow because electrons moving inside the tube collide with atoms, which, in turn, begin to glow.
What neon can do for a car
Neon light will not affect the technical component of the car in any way. This is understandable even to a schoolchild. But the lighting can completely transform the appearance of the car, complementing it with an incredibly attractive design. But besides this, neon light can also provide practical help.
The video shows how you can use the neon electric lighting of a car as a light music:
So, if you install a light at the bottom of the car, then when driving at night the road will be better illuminated.
Based on the point of view of experts and professional designers, you understand that installing neon electric lighting is most suitable for sports cars. Such light is able to highlight certain parts of the vehicle, show it in all its glory, add value to it, etc. This is a kind of business card, a means of promoting the “iron horse” among similar cars. And if the vehicle does not have anything special, is equipped with a low-power engine and does not have any special differences, it is most likely not worth filling it with lighting.
Main directions of LED tuning
Almost all parts of the car can be tuned using LED elements, except, of course, the engine compartment. There are several main directions in modernizing a vehicle using lighting.
LED tuning of vehicle optics
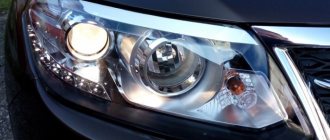
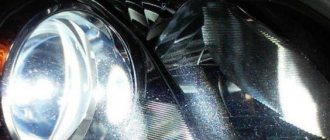
The most popular tuning method among vehicle owners is upgrading car headlights using LEDs. You can upgrade not only the main headlights, but also the foglights, dimensions and stops. LED strips are most often used for this. With simple manipulations, using diode strips and a soldering iron, as well as additional electrical wires, you can connect the lighting to the headlights and the constant plus of the car. The addition of vehicle optics is most often carried out by owners without the help of professionals. LED lighting has a number of advantages not only in comparison with conventional light bulbs, but also in comparison with modern neon ones. LEDs are characterized by economical energy consumption, long service life and lack of glare. And also by installing LEDs in the optics, you can give your car a unique and inimitable look. A widely known tuning element among car enthusiasts is “angel eyes” - the installation of colored rings made of diode tape around the vehicle’s standard lighting fixtures, which gives the car an aesthetic appearance. And also an original design solution can be the creation of a grille or a logo of the brand and model of the car on the bumper of the vehicle.
Interior lighting as a tuning option
An equally popular area of LED tuning is the installation of illumination elements in the car interior. The salon has more alternative solutions for expressing your imagination, and you can also experiment with the color scheme of LEDs in the salon. If it is desirable to use only white and yellowish shades for the optics in the car, in order to avoid problems with road inspectors, then different color combinations of diode lighting are possible in the cabin.
A common modernization method is to illuminate the thresholds and car handles when opening the door. This is not only an original and stylish type of tuning, but also a practical solution to inconvenience in the dark for the driver and passengers. More difficult is the installation of lighting on the bottom of the door, which, when opened, will reflect the logo of the brand or model of the vehicle on the asphalt. To create lighting with a logo, special ready-made LED elements are used, or by burning or cutting out on plexiglass, you can create your own logo for the car with your own hands.
And also a practical tuning option is to install lighting for the driver’s feet in the car, niches and glove compartments, and the instrument panel. The lighting equipment with a scattering effect on the ashtray and cigarette lighter looks original. The trunk can also be customized with lighting elements, which will help you easily find the right thing there at night. The salon is a huge platform for realizing your ideas when tuning a vehicle using lighting fixtures.
Tuning wheels and underbody of a vehicle with LEDs
Installing lighting elements on the wheels and bottom of a vehicle is a unique way to make it stand out from the general gray mass. Indeed, correct and original tuning of the underbody of a car with low ground clearance creates the unique effect of a car flying above the road. Upgrading the wheel rims with lighting elements also gives the vehicle a unique look. You can improve disks using LEDs in sealed capsules and LED chips
LED strip can also be used to modify wheels, however, you need to pay attention to the level of its protection; it must be at least IP67 in order to guarantee a long service life due to aggressive conditions of use. Basically, lighting elements are installed on the disk casing or on specially made stands with plastic ties
Sometimes, if the disks have a small number of small holes, they put single LEDs in the holes - this also looks original when the car is moving.
Thinking through the design
Of course, a car with neon lights looks amazing! And neon interior lighting, when installed correctly, can significantly change the interior of a car. Such lighting looks most advantageous in the dark, as well as on a snowy road in winter.
ADVICE! Think about the color scheme of your lighting in advance. Leading automobile designers, when choosing any type of lighting tuning, recommend choosing it not to match the body, but to contrast it. For example, if you have a blue car, then cherry-colored neon lighting will look much more impressive. Is it difficult to decide on colors? No problem! "Da Vinci's color wheel" can help you.
A car with neon lights looks amazing
Let's start installation
You purchased a brand new neon kit for your car, brought it home and are ready to install. To get started, please read the instructions carefully.
If you decide to install neon lighting for the car interior, then the tape is attached starting from the rear of the car to the trim using superglue or a special adhesive strip included in the kit. Just glue the cord in the right place and connect the batteries to it - car electrics, regular batteries or an inverter for connecting to the cigarette lighter. Connect the wires in the correct sequence: from the + contact of the battery to the place where you plan to install the switch, and connect the negative contact to the body. For a neon cord up to 5 meters long, a 12-volt inverter is sufficient. It can be used to create designs, variations of shapes and colors that are limited only by your imagination.
If, for example, the bottom of a car is chosen as the location for installing the neon, then first you need to mark the fastening. And then:
- Don't forget to buy the necessary tools, silicone for insulation, fastenings (staples, screws, clamps), wires and a transformer.
- Install the tubes according to the intended pattern.
- Now feel free to tackle the electrics. The wire connection is serial. Observe polarity.
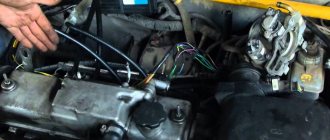
- The transformer is secured under the hood with screws. We connect to the battery with high-voltage wires. Then we pull the switch from minus into the interior. All that remains is to connect the wires from the tubes to the high-voltage unit.
Ready! Your car has been completely transformed. Now get ready for the admiring glances of passers-by and other motorists. Good luck on the roads.
Illumination of the underbody of a car can turn an ordinary car into a brutal car that is impossible not to pay attention to. Modern craftsmen from tuning studios offer a choice of several types of illumination for the underbody of the car, it all depends only on the desire and financial capabilities of the client.
The capabilities of modern electronics make it possible to perform backlighting:
- flashing;
- multi-colored;
- flashing to a point;
- changing light shades.
If desired, you can not only illuminate the underbody of the car, but also illuminate such elements as:
- wheel arches;
- trunk;
- radiator;
- headlights and taillights.
Given the ability to illuminate almost any element of the car, there is no need to turn the car into a New Year tree or a light monster. Correctly executed car illumination causes admiration, but oversaturation with light irritates others.
When installing lighting equipment, you should comply with the requirements of regulatory documents; you should especially pay attention to this when installing the lighting yourself. In workshops, technicians usually follow these rules and draw the customer's attention to this during installation.
Types of underbody lighting
Before illuminating the underbody of the car, you should familiarize yourself with the proposals in this sector. Modern lighting is divided into:
- LED;
- and neon.
Both types of light illumination have both their advantages and disadvantages.
LED backlight is a shock-resistant, usually plastic tube with an LED strip placed in it (photo below).
LED strip has become widespread, allowing you to cut pieces of the desired size in the designated places. The main advantage of this type of lighting is the simplicity and reliability of the design, attractiveness of prices when purchasing equipment and installing the product.
The disadvantages of this type of body lighting include the fact that the bright multi-colored light cannot be focused and made into spot lighting.
LED lights
Neon lighting is several gas-discharge lamps located in a shock-resistant housing (photo below).
Neon lighting allows you to focus and direct light to the right place, creating a spot lighting effect. But this is where the advantages of this type of vehicle underbody lighting end. Fragile neon emitters very often fail and require additional money.
Neon lighting, compared to LED lighting, loses in brightness and variety of glow.
Neon lights
The complexity of installation, and therefore the cost of this work, is an order of magnitude higher than that of LED devices.
Control block. In order to be able to use various light combinations on the installed equipment to illuminate the underbody of a car, you will need a backlight control unit. Without this element, the car’s lighting will turn out to be simple, with uniform illumination. When choosing a control unit, you should pay attention to two points:
- number of programs offered;
- remote control of installed equipment.
The more programs offered by the manufacturer, the more possibilities there are in implementing backlighting. Remote control of lighting equipment will allow you to get rid of unnecessary holes in the body and other elements of the car.
How to install backlighting on a car
Car illumination can be done in two ways - contact a specialized workshop or do it yourself. With the installation of lighting in the workshop, everything is simple, the main thing is to find a decent one, as well as the availability of money and time.
If you like to experiment with your car and create something with your own hands, then installing undercar lighting is the job for you. The advantage of self-installation is not even the factor of saved money, but the opportunity to experiment with the choice of lighting. If you don’t like the result of the work, you can try a different lighting solution.
To install LED underbody lighting yourself, you will need:
- colored LED strip with moisture protection and good brightness;
- cable with 4 small cross-section cores;
- heat-shrinkable sleeves suitable for the cross-section of the cores;
- U-shaped aluminum profile into which the LED strip is inserted;
- system control unit.
When installing, you should pay attention to several nuances:
- It is better to mount the system control unit in the engine compartment, closer to the fuse box.
- To obtain even light, when placing the LED strip, it should be placed symmetrically, at an equal distance from the elements of the car.
- Attach the system elements so that they do not hang down anywhere and do not rub against the elements of the car.
Video: instructions for installing underbody lighting.
It is better to entrust the installation of neon lighting to professionals, but you can try to do the simplest one or two emitters yourself. Neon lighting is rarely flashing, since gas-discharge lamps have a very long start-up time, and frequent switching significantly reduces their service life.
Nuances of operation
Many motorists are interested in the question of whether illumination of the underbody of a car is prohibited, and what kind of violation is provided for this.
In a number of regions, traffic police officers have a negative attitude towards illumination of the underbody of the car. Most inspectors believe that the installation of light illumination falls under Article 12.4 of the Code of Administrative Offenses, Part 1, which provides for a fine for illumination of the underbody of a car for individuals of up to 3,000 rubles with confiscation of the specified devices and accessories.
However, in accordance with Article 12.5 of the Code of Administrative Offenses, Part 3, for driving a car with incorrectly installed lights, you can lose the right to drive a car for a period of six months to one year.
Due to severe penalties, it is better to use car lighting in areas specially designated for auto shows.
Installing underbody lighting
So, let's begin:
It is necessary to ensure the functionality of the future lighting before installing it on the bottom of the car. It's better to do this in the garage next to the car. The backlight can be connected in series or in parallel. The first option is suitable for illuminating the entire bottom. Two wires are connected to the power source. In the second case, all parts of the backlight are connected in parallel and an additional wire is connected to the power supply
It is important that with one-sided feeding, the length of the tape does not exceed 5 meters. Cut the tape (along the cut line) into the required number of pieces. The length of the components should be based on pre-made calculations + 20 cm
Here you need to prepare the wires to connect the segments. At the joints, the tape is tinned and, observing polarity, connected. Connect the finished prototype to a power source and isolate the solder joints using heat-shrinkable tubing. It is not recommended to use ready-made connectors. This reduces the reliability of the system due to constant vibrations during vehicle operation. Nylon ties will be used to secure the tape to the profile. The adhesive tape will most likely come off. At the junctions of the latter, holes must be made in the profile. The distance between the ties is 10 cm. Cut the fastening profile with a margin of 3–5 cm. Additional length is needed for reliable fastening at the soldering points. So that, so to speak, it doesn’t hang out. Do not allow the tape to sag or stretch. This may lead to the latter breaking. Think in advance about a place to mount the control unit and RGB controller in the car interior. Here, following common sense, you need to connect the backlight to power. An important element of the backlight is the fuse. It must be provided in a location convenient for maintenance in the gap of the positive wire. Since the RGB strip may experience overloads during vehicle operation, it would not be superfluous to additionally “acquire” a stabilization circuit. This requires additional description and electronics skills. In other words, it will work without it, but this way the backlight is less likely to burn out.
Any installation or repair work must be completed by testing the finished system.